Paging, inventory, and tools
Set up paging rules and on-call alerting thresholds, define inventory types for tracking gear, and launch Winbox straight from the browser.
Set up Paging Rules
In the event of a network outage, Swift Fox can automatically page your on-call technician. It supports both SMS and Email paging, as well as Pagerduty API integration. We also support paging different thresholds at different times of day, and paging for different severities.
- Go to the Paging and On-Call Settings page under Network → Settings
- By default, all of the timespans will be set to page the first user created at the ISP. Feel free to add users to each timespan, or edit and add timespans if you want specific control over paging coverage.
- If you click on the “Infrastructure Paging Rules” tab, you can see all of your infrastructure at a glance, and bulk-edit them to assign different paging rules. Most ISPs will have one set of rules for critical infrastructure to page out quickly, and another set of rules for point to point customers or devices that are less essential but still need paging
- By default, paging will use the preference set by the user account on either the My Account page or the Manage Users page, but this can be overridden by cllicking the edit button next to the contact method.
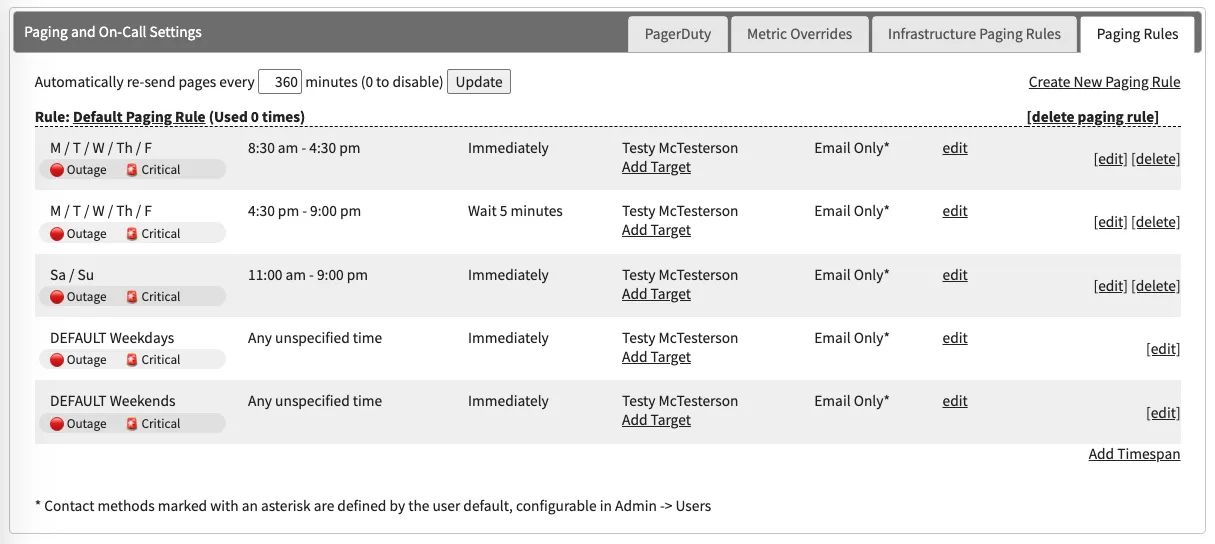
Paging rule timespans with assigned users and delivery methods.
Metric Overrides
Swift Fox supports paging on a large number of metrics, from ICMP pings to things like backhaul utilization percentage, or battery charge remaining, CPU temperatures, etc. By default, we only send pages to “Outage” or “Critical” severity thresholds, and we only set these for ping quality based thresholds. “Warning” severity by default will only show on the network map as yellow issues triangles.
To receive pages for other metrics, you can either override these thresholds directly on each device, or you can override them by paging rule or globally for the entire ISP. Some ISPs will also send all warnings to email and leave only the outage-severity pages for SMS.
- Go to Paging and On-Call Settings page under Network → Settings, then click on the Metric Overrides tab.
- This rather dense chart will show all of the current default thresholds for paging or warnings. You can select which overrides you are using from the dropdown at the top, and you can override any specific rule by clicking the link for that row.
- When editing a threshold, you will often set the “Resolved” threshold to be a distance apart from the Warning/Outage/Critical threshold. This helps provide a “dead space” between a down page and an up page, so you don’t end up receiving a ton of pages for a device that straddles the border.
- Each threshold also has a timeout in minutes - this will be how long it will wait before raising the alert. For example, you may want to know immediately if a core router goes down, but you might want to wait 5 minutes before you page that it’s back up again. Or you may want to wait 15 minutes before paging that CPU usage is high, to avoid paging on a momentary spike.
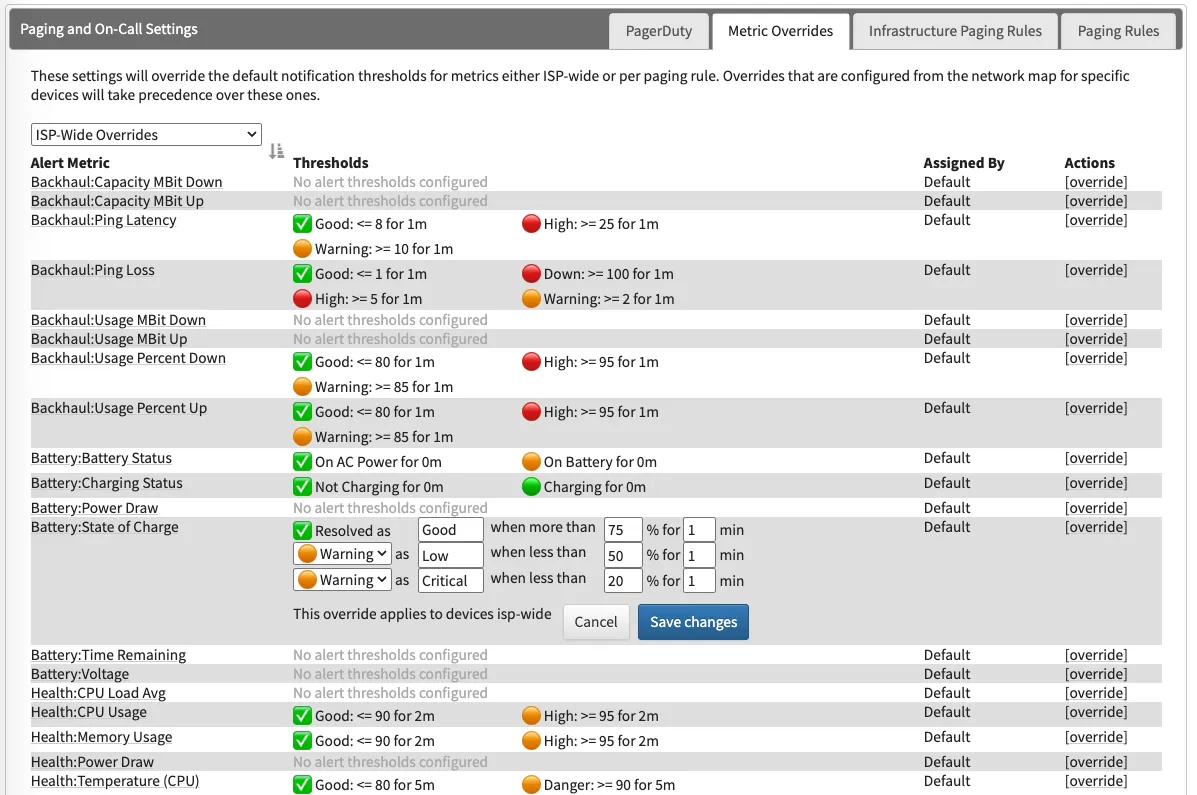
ISP-wide metric overrides: alert thresholds per metric, editable inline.
Add Inventory Types
Swift Fox has a feature-filled inventory tracking system that supports keeping track of new shipments, RMAs, shipments between different offices, etc. For most ISPs, you’ll only need to add the types of devices you install at customer locations.
- Go to the Inventory page under the Network menu
- If you use the example model you can leave it, but otherwise click “NanoBeam 5AC Gen2” and then uncheck “Enabled” to remove it. Feel free to rename the Ubiquiti manufacturer or 5GHZ 802.11ac category to something that you use if need be
- Click the “Add Manufacturer” button to add a new type of manufacturer (like “Cambium”)
- Click the “Add _____ Type” (for your manufacturer), to add a new category for it (like “5GHz”)
- Click the “Add _____ Model” (for your category), to add a new model type (like “ePMP100”)
- For new models, make sure to select an appropriate Data API if there is a matching one. This lets Swift Fox gather data from this type of device automatically
- Make sure that “Networking” is checked off for devices that you want to monitor or have attached to Internet Services
- Serial Number and Asset ID should only be checked if you want to require these be entered when inventory is received or installed
Set up the Winbox Launcher
If you prefer to use Winbox to administer your Mikrotik routers, it can be a pain to type in the IPs and logins for each one. Swift Fox supports a URL hook launcher for Winbox to be launched with the IP, username, and password directly from the netmap by right-clicking the device and choosing “Open in Winbox”. To set this up, you will need to configure a URL handler on your local computer.
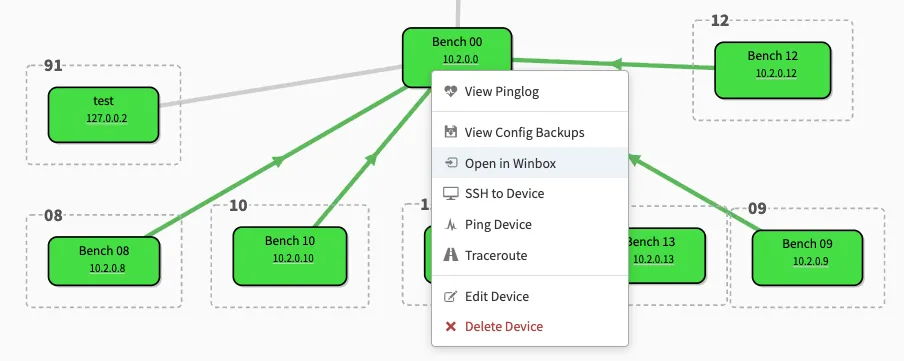
The device menu on the network map, with Open in Winbox.
Windows Instructions
- Place winbox.exe in the C:\ root folder. If you would rather place it somewhere else, use notepad to edit the .reg file in the next step to change its location before running it. The location would need to be changed in two places
- Download the winbox-launcher.reg file from your Swift Fox instance, and open it to install the registry entries.
Mac OSX Instructions
- Follow the instructions from the Mikrotik wiki to install Xcode and Homebrew, then use homebrew to install xquartz and wine-stable. Download winbox.exe and confirm you can run it from the console using “wine winbox.exe”
- Download and unzip the swiftfox-winbox-launcher.app applescript app from your Swift Fox instance, but don’t run it yet
- Press Command-Spacebar and start typing “AppleScript Editor” to bring up the editor software and press enter
- Use the editor to open the downloaded .app file, and modify the full path to your winbox.exe to be correct. Save this again
- Double click the .app file in the finder to run it. Nothing will happen but it will have registered the URL handler correctly.
- Be aware that the first time you launch Winbox using Wine it may take awhile to load, and will have no loading indication. If you leave a winbox window open, subsequent ones will load quickly. This is a limitation of Wine on OSX